Developer Guide
Where to Start
Whether you’re are maintainer of aguaclara or a user with a bug fix, feature, or enhancement in mind, the aguaclara Github repository issues are a great place to start.
Before working, browse the issues to check if the update you have in mind has already been documented and assigned to a developer. If a relevant issue doesn’t exist, go ahead and make one with the button labeled “New Issue”. If/once an issue does exist, there a few ways to proceed:
if you’re a collaborator of the
aguaclararepository, assign yourself to the issue.if you’re not a collaborator, either ask a collaborator to make you a collaborator as well, or ask the collaborator to assign you to the issue.
Feel free to use the issue for commenting on your progress or asking other users or collaborators for help with your development.
Setting Up Your Local Environment
If you want to make changes to aguaclara, you should make the package available locally.
Make sure to have Python,
pip, and Git installed (for guidance, see Installing Software). Check the package’s Pypi page for the required Python version. If you must have a different version on your computer for another project, you can use pyenv to manage multiple Python versions.Install Pipenv, a package management and virtual environment tool, by running the following command in the command line:
pip install pipenv
In the command line, navigate to the directory in which you’ll keep your local copy of the
aguaclaraGit repository.If you’re not a collaborator, you’ll need to first fork the repository on Github.
Clone the repository or your fork of the repository into that directory:
(Cloning original repository)
git clone https://github.com/AguaClara/aguaclara.git

(Cloning forked repository)
git clone https://github.com/{your_username_here}/aguaclara.git
Navigate into the newly cloned repository and install it in editable mode, so that your environment uses this repository as your
aguaclarapackage, even as you edit it:cd aguaclara pip install --editable . -U --user
To install the package in editable mode in a virtual environment only, replace the second line with
pipenv install --dev -e .(.passes the current directory as an argument to the-eflag, short for “editable”).Install the package’s user dependencies and development dependencies:
pipenv install --dev
Pipenv is used to install the dependencies from the file called
Pipfileinto a virtual environment. See the Dependencies, Virtual Environments, and Pipenv for more details.You can check whether you have a fully provisioned testing environment now by running:
pipenv run pytest
The tests should all pass. If they don’t, check in with the latest Github Actions build of the master branch to see what difference between the Github Actions environment and your local environment could make the tests fail.
Branching
Before you develop, it’s important to understand the branching conventions for the aguaclara repository.
The Master Branch
The master branch is the branch that houses aguaclara’s published releases. Therefore, the master branch is a protected with rules (on Github) that
pull requests are required before merging into the branch,
only administrators and maintainers can push to the branch, and
status checks are required before merging or pushing to the branch.
Your Development Branch
This means that all work starts on development branches, or task or feature branches. (Check out this article if you want to learn more.)
It is recommended that you name your branch {your_development_type}/short-description. Some examples of development type are
|
|
To make and switch to your new branch, run:
git checkout -b {your_development_type}/short-description
Documentation and Test Driven Development
1. Write Documentation
Your development should begin with documentation – that is, creating a blueprint of the code you plan to write. In this blueprint, each new or modified module, function, class, or method should be defined with a documentation string (i.e. comments, specifications, docstring) that describes its purpose and functionality, before any code is written. You can read more about documentation driven development (DDD) in this short blog.
For docstring syntax, see Sphinx Documentation. For style, see Docstring Conventions.
If possible, gather feedback from likely users after writing the documentation. Modifications are much more easily made to documentation than to code.
2. Write a Test
Next, write a unit test for your code based on the documentation. A unit test tests a basic unit, e.g. function or method, of your code. If a unit of code produces the expected (documented) outputs for accepted inputs, its test should pass. If it behaves any differently from what is described in its documentation, its test should fail. Make sure to test all types and/or edge cases of accepted inputs (this last part is known as black box testing). You can read more about test driven development (TDD) here.
For details on writing tests, see Python Testing.
All test files should be located in the tests/ directory. To execute the tests in a test file, run the following command in the command line:
pipenv run pytest path/to/file -v
where the -v flag gives a verbose (more descriptive) output. To execute specific tests in a test file, run:
pipenv run pytest path/to/file -v -k name_of_test
3. Write Code to Pass Failing Test
Since you haven’t written any code yet, your test should fail. Now write just enough code to pass the failing test.
For code style conventions, refer to Python’s Style Guide. You can also use flake8, a Python linter (code style checker), and black, an automatic code formatter, to achieve proper style.
4. Refactor
If your test still fails, refactor (modify) your code, still keeping it as simple as possible, until the test passes.
5. Repeat
Repeat steps 3 and 4 until tests cover all the functionalities described in the documentation.
Sphinx Documentation
Sphinx and RST
aguaclara’s documentation, including this page, is built using a tool called Sphinx, which uses reStructuredText (RST, ReST, or reST) as its markup language. RST files have the extension .rst. The source files for aguaclara’s documentation are found in the docs/source directory.
For a brief introduction to RST concepts and syntax, see Sphinx’s reStructuredText Primer.
Automated Documentation
You may have noticed that aguaclara’s modules, classes, functions, and constants are not manually documented in the API Reference pages. Instead, they are automatically documented using an RST directive, .. automodule::, which reads the docstrings in the source code. Hence, docstrings must be written in correst RST and can include all the usual RST markup (e.g. headers, code blocks).
For more details on including documentation from docstrings, see the Sphinx autodoc extension.
Previewing Documentation
Some IDEs offer extensions for previewing the HTML pages that Sphinx generates from the RST files. (One great extension is reStructuredText by LexStudio, Inc. for Visual Studio Code.) You can also build the documentation from the command line:
cd docs
pipenv run make html
The resulting HTML files will be written to the docs/build/html directory. You can then open and interact with them in a browser.
Validating Documentation
The html-proofer package can be used to check the correctness of the rendered HTML pages (e.g., that there are not broken links). To install the package, download RubyGems and then run:
gem install html-proofer
cd docs
htmlproofer build/html --allow_hash_href --file_ignore "build/html/search.html"
Alternatively, you can commit your changes, push them to Github, and check the “Build” workflow for your commit in aguaclara’s Github Actions page (or that of your forked repository). See Continuous Integration via Github Actions for more details.
Committing and Pushing
It’s a good idea to commit your work early and commit often. Saving more snapshots of your work through Git facilitates debugging and resetting code while logging your progress.
Before committing, check if your work generated any user, operating system, or IDE specific or other otherwise unnecessary developer files in your
aguaclararepository. If so, add their files names or directories to the.gitignorefile.If you have files in a directory named
tests/rst_files, run in the command line:git update-index --skip-worktree tests/rst_files/*
Now, stage your changes and commit them with a short but descriptive commit message. From the
aguaclararoot directory, run:git add . git commit -m "your message here"
Make sure to also occasionally pull commits from the remote Github repository, if anyone else is working on your branch, and to push your commits:
git pull
git push
For more guidance on using Git in the command line, see the AguaClara Tutorial Wiki.
Continuous Integration via Github Actions
Continuous integration (CI) is a software development practice that allows multiple developers to frequently merge code into a shared repository. CI usually involves automated tests and builds of the code to make sure it is correct before integration.
The aguaclara package uses Github Actions for continuous integration. More specifically, several “workflows” have been defined in the .github/workflows directory to accomplish various tasks:
Workflow |
Trigger |
Tasks |
|---|---|---|
Build |
Push, pull request |
Validate code and documentation, check code coverage |
Documentation |
Push to master branch |
Build and publish Sphinx documentation |
Publish to Pypi |
Publishing of release |
Build and publish the package to Pypi |
The Github Actions documentation is a great place to learn more about workflows and other aspects of Github’s CI platform.
Checking Workflow Results
Results of workflow runs can be viewed in the Actions tab of the aguaclara Github repository. If a job fails in the “Build” workflow for your latest push, find the error in the job’s log and debug from there.
Checking Code Coverage
Code coverage is a measure of the amount of source code that has been executed by tests. Whenever possible, all new or modified code should be covered by tests, so code coverage should either remain the same or increase with each contribution.
If you add a file of code that cannot reasonably be tested, you may add it to the list of files and directories ignored by Codecov in codecov.yml. (Note: such files are rare!)
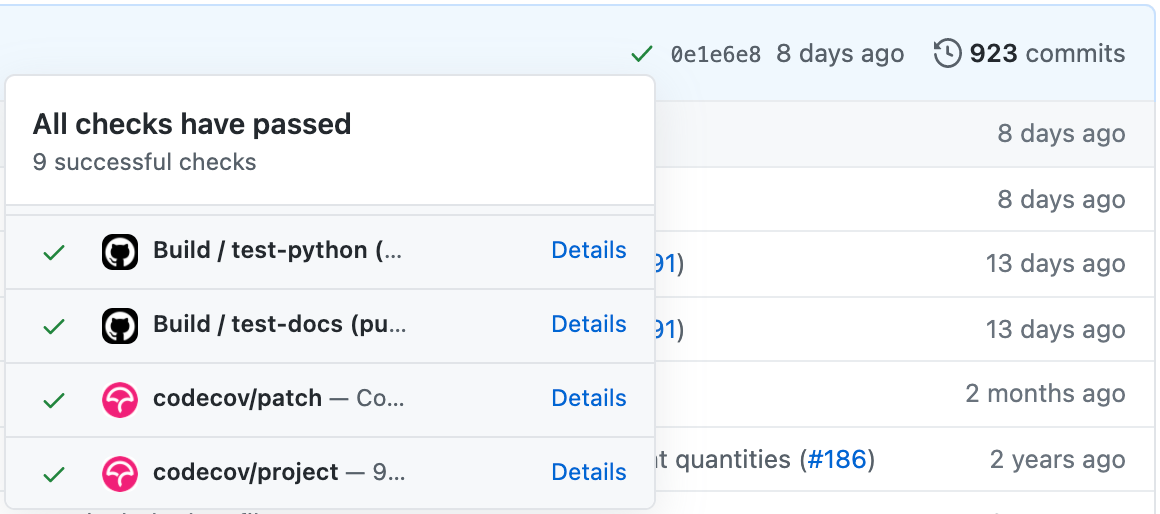
The “Build” workflow calculates code coverage and uploads a report to Codecov. The actual change in coverage can then be viewed on Codecov or in the dropdown of status checks next to the commit ID on Github (click on either a green ✓ or a red ✕).
If you’re a collaborator of aguaclara, you can also log in to Codecov through your Github account and view the “hit” and “missed” lines of code on Codecov (or directly on Github with a browser extension).
Preparing for Release
If you code has been fully documented, tested, and implemented and is passing all status checks (see previous section), you’re ready to prepare for a release.
Semantic Versioning
The aguaclara package follows semantic versioning, meaning that its version numbers take the form of vMAJOR.MINOR.PATCH.
Currently, the package is still in major version 0 (v0.MINOR.PATCH), i.e. in beta, so it is NOT considered stable. Version numbers during this stage are generally incremented as follows:
MINORis incremented with incompatible API changesPATCHis incremented with backwards compatible features and bug fixes
Once the package is stable, the package version number can be incremented to v1.0.0. (This will most likely happen after the onshape_parser tool and the AguaClara Infrastructure Design Engine, AIDE, and become stable.) From then on, versioning should adhere to the following rules:
MAJORis incremented with incompatible API changesMINORis incremented with backwards compatible feature additionsPATCHis incremented with backwards compatible bug fixes
Determine what version number is most appropriate for your release and update setup.py accordingly:
# ...
setup(
    name = 'aguaclara',
    version = '0.3.0',  # Edit the version number here
    # ...
)
Merging from Master
To ensure that your code can safely integrate with the aguaclara package, pull any new changes that were made to the master branch and merge them into your development branch.
git checkout master
git pull
git checkout name_of_your_branch
git merge master
Note
Follow Github’s instructions for Syncing a fork if you’re working in a forked repository.
If the merge is successful, your command line may automatically take you to a text editor to edit or accept a default commit message for the merge. If using the Vi text editor, type :x and hit Enter to save and exit.
If the command line alerts you of merge conflicts, open the files with conflicts in your IDE and manually resolve them. Many IDE’s, such as Visual Studio Code, also have built-in support for handling them. For a better understanding of merge conflicts, check out this article by Atlassian.
Pull Requests
Once you’re finally ready to merge your code into the master branch…
Push any final commits on your branch.
Create a pull request (PR) on Gitub to merge your development branch with the master branch.
Follow the pull request template to write a title and description for your PR.
Add at least one reviewer who is a maintainer of
aguaclara. You can also tag, message, or email them to make sure they know to give a review.Wait for the reviewer to approve and merge the PR or request changes.
Publishing a Release
If your PR has been merged into the master branch, publish your release (or ask a collaborator to) as follows:
Go to the Releases on the
aguaclaraGithub.Click “Draft a new release”.
Create a new tag with the same name as the new version number (e.g. v0.3.0).
Give your release a title and description.
Publish the release!
Now, the “Publish to Pypi” workflow will trigger in Github Actions to make the new release available on Pypi. The “Documentation” workflow will be running as well to update this documentation website.
Make sure to close relevant issues if they were not automatically closed.
Congratulations on making a release, and thanks for contributing to AguaClara!
Additional Topics
Dependencies, Virtual Environments, and Pipenv
Every Python project must specify the exact names and versions of its dependencies, i.e. other libraries and programs it depends on, so as to not fail on users’ and other developers’ computers. Virtual environments are used to prevent dependency conflicts between Python projects. According to the Python Standard Library documentation,
“A virtual environment is a Python environment such that the Python interpreter, libraries and scripts installed into it are isolated from those installed in other virtual environments, and (by default) any libraries installed in a “system” Python, i.e., one which is installed as part of your operating system.”
Pipenv wraps over pip and virtualenv to manage dependency specifications and virtual environments. It does so with the help of two files:
Pipfile- where developers specify user/default dependencies and developer dependencies. These should include only top-level dependencies (no sub-dependencies).Pipfile.lock- an auto-generated file that specifies the exact requirements for reproducing an environment (including sub-dependencies). Do not edit manually!
Some important commands for Pipenv are:
pipenv install- installs default dependencies fromPipfileinto a virtual environment.pipenv install --dev- install default and developer dependencies fromPipfileinto a virtual environment.pipenv install <package>- installs a package into the virtual environment and updatesPipfile.pipenv lock- creates or updatesPipfile.lockto specify all dependencies and sub-dependencies and their current versions in the virtual environment.pipenv sync- installs packages into the virtual environment exactly as specified inPipfile.lock.pipenv run <command>- runs any terminal command in the virtual environment.
Refer to Real Python’s guide or Pipenv’s documentation for more information.
Docstring Conventions
The aguaclara package has used the Sphinx format and the NumPy format for documenting modules, classes, functions, and constants. Regardless of which you use, the NumPy documentation is a good conceptual and technical resource.
- Exceptions:
Descriptions of parameters and return values usually report data types. For some parameters and return values in
aguaclarathat are clearly numeric (of type int, float, or complex), the data type is replaced with the scientific unit of the value, e.g.u.degCforTemperature. See the Units module for a list of frequently used units.In some cases, it’s more appropriate to include an example of code as a static RST code block rather than as a doctest. For more information on doctests, see Python Testing.
A constant can be documented by comments starting with
#:in the lines immediately above it. See the source code of the Constants module for examples.
Python Testing
aguaclara uses the pytest package and the unittest package for testing Python code. See tests/core/test_physchem.py for examples of using pytest and tests/design/test_cdc.py for examples of using unittest.
Some modules also use Python tests that are written directly in the docstrings – that is, doctests. Here’s an example from design/cdc.py:
"""
...
>>> from aguaclara.design.cdc import *
>>> cdc = CDC(q = 20 * u.L/u.s, coag_type = 'pacl')
>>> cdc.coag_stock_vol
<Quantity(2500.0, 'liter')>
"""
All doctests must pass, i.e. the lines of code following the >>> must yield the value immediately after. One way to execute the doctests is to run:
pipenv run pytest path/to/file -v --doctest-modules
To check all doctests in the package at once, run:
cd docs
pipenv run make doctest